The official rules of ping pong has already been altered so many times in the past recent years to accommodate fair game-play and to make it a lot more entertaining to the audience. But for ordinary or casual players, the rules still remains very simple.
If you want to learn the basic rules, then you should read the post entitled, "Ping Pong Rules for Beginners".
So how exactly are you going to properly serve the ball?
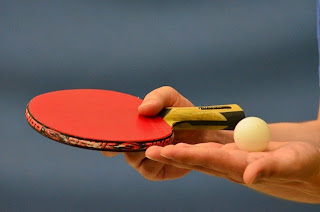
The ball must always be above the level of the playing surface of the table which must be clearly visible to the opposing player. It must also be served behind the server's end line. Some players call the end line as the "imaginary extension". This is exactly behind the end of the table.
Once in the proper spot, the free-hand should hold the ball tossing it in an upward direction. As the ball starts to fall, the player should immediately hit it with his paddle (some people also call it "racket" or "bat").
The Number of Serves
When a new set of rules issued by the ITTF took place back in 2001, it has affected the number of serves allowed for each player. This rule was the "Official Scoring-point System" where the old 21 points system was reduced down to only 11 points.
In the old 21 points system, each player were given "five serves" each. While on the new system, each player has only "two serves" each.
Once the ball has been served into the opponent's side, the opposing player should hit it back over the net. Upon hitting it, the ball should bounce at least "once" on the server's side of the table. If the ball bounces twice or more then the server losses the point.
Double Team
Ping pong can be played by a maximum of four players. They will be competing against each other by teams consisting of 2 players on each side. In short, it's a 2-on-2 match. With the current 11 point system, the rule of serving the ball remains the same but this time, each pair of players are only given two serves.
Just like on a Single Match, the serving of the ball will alternate between the two competing teams for every two points. Another difference when playing and serving the ball on a Double Match is that, the ball must bounce only on the half portion of the table on both sides.
If it happens that the server has gained two score points, the receiver will take the place of the server and the previous server becomes the receiver.
Game Play
When the receiving side managed to hit the served ball back, the server's partner must be the one to take the counter-shot. If the shot has been successfully returned then the receiver's partner (the other player who didn't hit the served ball) own turn to hit the ball. The sequence of hitting the ball goes alternate between the two partners.
If you want to learn the basic rules, then you should read the post entitled, "Ping Pong Rules for Beginners".
So how exactly are you going to properly serve the ball?
The ball must always be above the level of the playing surface of the table which must be clearly visible to the opposing player. It must also be served behind the server's end line. Some players call the end line as the "imaginary extension". This is exactly behind the end of the table.
Once in the proper spot, the free-hand should hold the ball tossing it in an upward direction. As the ball starts to fall, the player should immediately hit it with his paddle (some people also call it "racket" or "bat").
The Number of Serves
When a new set of rules issued by the ITTF took place back in 2001, it has affected the number of serves allowed for each player. This rule was the "Official Scoring-point System" where the old 21 points system was reduced down to only 11 points.
In the old 21 points system, each player were given "five serves" each. While on the new system, each player has only "two serves" each.
Once the ball has been served into the opponent's side, the opposing player should hit it back over the net. Upon hitting it, the ball should bounce at least "once" on the server's side of the table. If the ball bounces twice or more then the server losses the point.
Double Team
Ping pong can be played by a maximum of four players. They will be competing against each other by teams consisting of 2 players on each side. In short, it's a 2-on-2 match. With the current 11 point system, the rule of serving the ball remains the same but this time, each pair of players are only given two serves.
Just like on a Single Match, the serving of the ball will alternate between the two competing teams for every two points. Another difference when playing and serving the ball on a Double Match is that, the ball must bounce only on the half portion of the table on both sides.
If it happens that the server has gained two score points, the receiver will take the place of the server and the previous server becomes the receiver.
Game Play
When the receiving side managed to hit the served ball back, the server's partner must be the one to take the counter-shot. If the shot has been successfully returned then the receiver's partner (the other player who didn't hit the served ball) own turn to hit the ball. The sequence of hitting the ball goes alternate between the two partners.
If you have some questions regarding about the rule of serving the ball that has not been covered on this post, use the Comment Form below.


